Hello, my name is Marcel, and I'm an Amulet Titan enthusiast from Munich. I'm here to tell you why you should play this deck—and how.
Why Amulet Titan?
I first encountered this strategy during my Erasmus year in Italy. Back then I played Green-White Valuetown and faced a guy on Amulet Titan, a deck of whose existence I wasn't aware up to that point. I won—thanks to
Besides plenty of top finishes in my local scene, store championship wins and such, my biggest successes so far with Amulet Titan were coming in 47th out of 497 participants at LMS Paris in September 2022 and a third place at the "German Modern Championship" in Frankfurt in January 2023 with 220 participants. The reason I wrote this primer is to help you gain a better understanding of the archetype and to give you the the tools to have a chance to win every possible matchup. Most importantly, I want to share not just what to sideboard, but also why we sideboard the way we do and how to interact in certain matchups.
The Archetype Amulet Titan
There are dozens of aspects that I love about Magic: The Gathering and that make the game so addicting. One general rule every player has to consider while crafting their deck is: The more explosive you want to be, the less consistent your deck is going to be, because either the combo gets way harder to assemble or one interaction from the opponent lets the whole house of cards fall apart. With very few exceptions—
Another aspect I really like is that, after all those years of new sets, bans, and unbans, Magic: The Gathering still largely follows the rock-paper-scissors principle. This means that our deck A is very good against deck B but very bad against deck C, while B is very good against C.
And now comes the interesting part and the reason I'm such a big advocate of the Amulet Titan archetype: What if I told you that all of the above does not really apply to Amulet Titan? Amulet Titan is not only super consistently killing on turn three to four, with the capability of doing it as early as turn two, it also sidesteps the usual rock-paper-scissors issue. When we kill this fast this consistently, how can we ever complain about a bad matchup?
Strengths and Weaknesses
So how does Amulet Titan even kill on turn two? With an untapped land, one green-producing bounce land such as
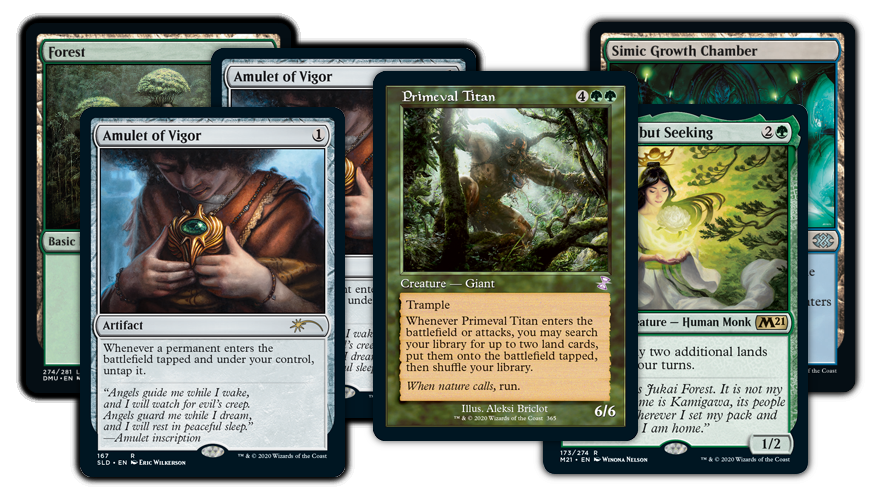
Next, cast
In spite of the many steps listed, Amulet Titan is a rather straightforward deck to play. But to master it we have to get in a lot of repetitions. What differentiates a great Amulet Titan player from a good (or even bad) player is how they sequence their turn and what counterplay they take into account. Do they start off with a
A great Amulet player knows to wait for their opening and doesn't run out of gas because they know which lands to fetch with their
Recent sets included a lot of effective cards against us. The archetype can be attacked from a lot of angles. One is pressure. If played correctly, Amulet Titan has a lot of grind potential. But what we never want to see is an unchecked
The power level of Amulet Titan is without a doubt very high, therefore I can't complain. But it is undisputable that we have to play around so many things nowadays. When I started running the deck, I was certain that my


Now, even when we have Cavern of Souls, we have to factor in that our opponent could have
Fun fact: When I started playing Amulet Titan, forgetting to pay for
Crafting the Main Deck
The following is my attempt to find the ideal list for the current metagame, where we have a fair amount of decks that use their graveyard. However, before every tournament we attend, we have to ask ourselves: Which decks will have the biggest meta share? If we expect a lot of Izzet Murktide players, go with four Cavern of Souls. Is there a lot of five-color nonsense running around with
In general though, as an Amulet player, don't worry too much about the current meta. That's for control players to figure out. We try to push our plan through, which means we want our deck to be as explosive as possible.
| Main Deck | |
|---|---|
|
|
Why 34 Lands?
The reason I play 34 lands is, first and foremost, that I like having all available utility lands in my main deck. Secondly, it gives me the flexibility to board some of them out in matchups where they don't shine as much, exchange them for more efficient answers, and still have the necessary density of lands.
Why Mycosynth Gardens?

Instead I like to integrate Mycosynths Gardens so that it synergizes with our deck, but we are not dependent on it. We also have to remember that by copying our own Amulet, we go down a land. No less important is the timing here: Be aware that the copy ability will fizzle if our opponent destroys our Amulet in response. Still, the potential to have more Amulets cannot be valued highly enough. Mycosynth Gardens replaces
Why (Only) Two Explore?

I would love to run more, as
Why Cultivator Colossus?

I have to admit that I'm not the biggest fan of
I experimented a little bit with
Why Endurance Main?

We always have to consider that running a singleton green creature actually means having five copies due to
The card is the perfect counterplay in various other scenarios. On top, few expect Endurance out of an Amulet Titan main deck. Even when its effect isn't particularly useful—in the end, it's a 3/4 boltproof body with flash. For example, it can be an emergency blocker against an
Why Crumbling Vestige?

When taking a look at our 34 lands, it becomes apparent that each has its purpose in specific matchups. But what about
Why No Turntimber Symbiosis?
Crafting the Sideboard
| Sideboard | |
|---|---|
|
|
Why Beast Within?
This is a very common question, and for the longest time (before the printing of

This card comes in handy against control,
The recent release of
Why Dragonlord Atarka?

Like Beast Within, this is a rather unconventional sideboard choice. But as with Beast Within, I'm equally convinced that it is the perfect sideboard card for Amulet Titan.
But the reason I initially came up with it was the matchup against Yawgmoth, which isn't great. Their combo is often faster, and after boarding they commonly have
Why Outland Liberator (and No Reclamation Sage)?


Summoner's Pact can fetch either, but one requires the problematic artifact or enchantment already in play while the other can be played preemptively. Since our deck already is a prominent victim of
Why Kozilek, Butcher of Truth?

This card's purpose is to fight one deck, and that is Blue-Black Mill, recently resurrected thanks to
Why No Veil of Summer?
Without a doubt,
Veil of Summer also got significantly worse since people learned and got the tools to play around it. Spells like
Why No Hydroid Krasis?
Why No Haywire Mite?
Keep or Mulligan?
Our ideal opening hand checks all of the following boxes. Note that our wildcard,
- three to four lands, including one untapped and one bounce land
- a one-drop in
or - an accelerator in
, , or - a payoff in
or
We should and can take aggressive mulligans to find a hand that enables us to have an explosive start and power out a Titan on turn three. The deck mulligans rather well. We easily negate the card disadvantage from a mulligan to six or even five as one Titan trigger already gives us two additional cards. It does get tricky at a mulligan to four though. We simply don't have enough space anymore to fit enough lands, a one-drop, an accelerator, and a payoff in our starting hand. From this point on, we simply have to pray that the top of our library is kind to us.
Obviously, one hand can be great in one matchup but horrible in another. For each specific matchup, you can find dedicated information in the sideboard guide below. First, I'm trying to give you a good idea of keepable hands against an unknown opponent in game one.
Case-by-Case Corner
Only one-drop and lands in starting seven:
In general, we always want to see an Amulet of Vigor in our starting hand. However, with six blanks, this is an easy mulligan.
Only Primeval Titan and lands in starting seven:
Same rule goes for Primeval Titan. We basically always want to see one in our opening hand, but only Primeval Titans won't make the cut.
Only accelerator and lands in starting seven:
100% mulligan.
No green source in starting seven:
While there are exceptions (for example double Amulet and Urza's Saga, which can find a green-producing land via
One-drop, accelerator, and payoff, but only tapped lands in starting seven:
100% keep.
One-drop, no accelerator, but Primeval Titan in starting seven:
Not great, but good enough on the play. On the draw: mulligan. However, if we have two
No one-drop, but accelerator, and payoff in starting seven:
Also not ideal. Giving our opponent three full turns while we only play lands is too slow. Casting our first spell on turn three, when our opponent only had two turns, is reasonable and a keep. Therefore: keep on the play, mulligan on the draw.
One-drop and accelerator in starting seven:
This is a 50/50 decision. We got all the ramp we need but are missing the payoff. If we have any utility land like
Only two lands, no accelerator, but one-drop and payoff in starting seven:
This is probably the most difficult decision. Since our deck contains more lands than spells and we can bet on drawing one in one of our next two draw steps, this is tempting. However, I often got stuck, unable to draw another land in time. Those are big "feels bad" moments.
Here it mainly depends on the lands and the one-drops. I'm using the following rules of thumb to navigate corner cases:
- One untapped and one bounce land with any one-drop ⇒ keep
- Two utility lands, one untapped, with Amulet ⇒ keep
- Two utility lands with Grazer ⇒ mulligan
- Two utility lands, both tapped, with any one-drop ⇒ mulligan
Only two lands, but one-drop, accelerator, and payoff in starting seven:
Unless the two lands are both bounce lands, it's a snap keep.
Memorize Important Play Patterns
With this deck, it is important to have numerous lines of play memorized. Especially against control opponents, we cannot overthink every step. Patterns repeat themselves but differ from each other quite heavily in terms of how they play out as we have to fetch different lands depending on the board state once
Most importantly, as soon as we know what our opponent is on, recall which cards their deck normally runs to stop us. What will we have to play around in the postboard games or even in game one? Our decisions should heavily depend on this information.
Sequencing: What Do We Play First?
Once we memorized all the patterns, Amulet Titan is rather straightforward to play. However, sequencing is where good players distinguish themselves. For starters, we mustn't give our opponent priority unless we have to. This means, if we have
Amulet of Vigor or Arboreal Grazer First?
This question isn't easy to answer and highly depends on the further makeup of our hand. But if we have an
When Do We Hold Back Arboreal Grazer?
We do so if we have one or multiple Amulets in play, a bounce land in hand, and aren't under pressure to stabilize the board. Always remember that one Amulet nets one extra mana when we cast Grazer and bring in a bounce land. You can find more detailed information on these mana calculations below.
When Do We Hold Back Amulet of Vigor?
If we have it in our starting seven, never. There are edge cases when we draw it later on where it might be beneficial against a control deck, but these scenarios don't come up often. In general, if we have the chance, we cast our Amulet.
When Do We Hold Back Bounce Lands?
If we have no Amulet and no
How Much Mana Does a Bounce Land Generate?
Below I list with how much additional mana we can end up when we pay for Grazer, Explore, Dryad, or Azusa and play a bounce land to use up just the additional land drops thus granted. If you are missing mana, cast these cards first (find them with
| Number of Amulets in play: | 1 | 2 | 3 | 4 |
|---|---|---|---|---|
| | +1 mana | +3 mana | +5 mana | +7 mana |
| | +−0 mana | +2 mana | +4 mana | +6 mana |
| | −1 mana | +1 mana | +3 mana | +5 mana |
| | +1 mana | +5 mana | +9 mana | +13 mana |
Remember that sequencing your land drops and casting your creatures correctly will make the difference between winning and losing!
What Lands Do We Fetch with Primeval Titan?
This is highly dependent on the board state. Nonetheless, it is very important never to expose us to our opponent to a degree where we don't have any gas left if they deal with our
If there is no interaction expected from your opponent, go for this line. Don't do this unless you have enough gas in hand or are absolutely sure they'll give you the attack trigger of your Primeval Titan as well:
One or two
with neither nor another in hand ⇒ get plus .
If we expect interaction from our opponent, such as
, , , et cetera, these are the most prevalent lines: With one Amulet ⇒ get
and or two . With two Amulets out and
and at least one other land in hand ⇒ get two Growth Chambers. (Return both to hand after floating eight mana and cast Colossus.) With two Amulets out and another Primeval Titan in hand ⇒ get Growth Chamber and Tolaria West. (Float six mana to cast second Titan, get Slayers' Stronghold plus Boros Garrison, and give haste to both.)
With three Amulets ⇒ get Growth Chamber and Tolaria West. (Now we have enough mana to transmute Tolaria West for Summoner's Pact and cast another Titan. We repeat this until we have three Titans in play, fetch for Stronghold plus Garrison, and give haste to all three.)
Four Amulets ⇒ same as for three since we only run two Tolarias. (Boost one Titan twice.)
What Do We Fetch with Urza's Saga?
This is easy to answer. If we have enough lands in hand or in play, we always grab
What Else Do We Do on the Final Chapter?
This one is simple too. Can we do something that progresses our board state if we float one mana before
What's important: If we don't have the
Also: Our opponent doesn't receive priority after we fetch with Saga. I had to learn this the hard way. I had four mana available, had just searched for Amulet, and had Summoner's Pact plus bounce land in hand. Instead of floating two mana with my land, which would have brought me to six mana, I cast the Pact first and my opponent responded with
Matchup and Sideboard Guide
Izzet Murktide |
The most prominent archetype in the Modern metagame, we better come prepared for this one. I consider this mainly a skill-based matchup; the better pilot will most likely win. However, if you play Legacy, you know those games against Delver where you can't resolve a single spell before you die from a turn two flipped
While it is a slight uphill battle, I like our odds in this matchup, and there are two reasons for it: Urza's Saga and
Being successful in game one is really important because winning two sideboarded games is tough. We also have to hope they don't make a metagame call with one or two
How To Win:
Be patient. Don't try to force it through their open mana unless you really have to, wait for your Cavern of Souls to show up and generate value by creating Construct tokens with Urza's Saga. Murktide is not prepared for that preboard. Our best play by far is a turn one
Try to keep their graveyard in check with
Pro Tip:
Dress Down negates the ability of
| bring in | take out |
|---|---|
|
|
Dismember is a must if they run Magus of the Moon. Otherwise you can make a case to keep some Urza's Saga in, especially on the play.
Overall matchup: slightly unfavorable
Hammer Time |
While I personally love this matchup, it's a scary one. With their explosiveness and capability to kill as early as turn two too, those Hammer Time decks are sometimes too fast for Amulet players to catch up to. One very important edge for us preboard is our all-star,
How To Win:
On the draw, keep hands with turn one Arboreal Grazer or interactive hands with
We try to play around
| bring in | take out |
|---|---|
|
|
Overall matchup: favorable
Black-Red Scam |
Send a prayer we dodge this matchup before every tournament because this is a tough one. They can
How To Win:
Keep up
Some Scam decks have access to
Pro Tip:
If we have a basic Forest in hand or play, and suspect our opponent to slam a Blood Moon effect on their next turn, we can sandbag our
| bring in | take out |
|---|---|
|
|
Overall matchup: clearly unfavorable
Five-Color/Jund Creativity |
Another tricky one, both versions. The five-color version has early interaction with
However, in a
How To Win:
I'd love to give better advice, but like in many matchups, we simply have to be faster. Against the five-color version this is totally doable, especially on the play. We can also manage it on the draw. However, they can tap down our one land in our second turn's upkeep, which often buys them enough time to resolve their
Pro Tip:
If we destroy Leyline Binding with its trigger on the stack, our creature won't get exiled.
| bring in | take out |
|---|---|
|
|
The second Tracker only comes in against the five-color version. We keep Bojuka Bog against Jund's reanimation angle.
Overall matchup: unfavorable
Burn |
This is probably the best matchup for us. We run 34 lands. The odds for
How To Win:
Honestly, just don't brick and keep a reasonably fast hand. Don't run into a
Pro Tip:
With double
| bring in | take out |
|---|---|
|
|
Overall matchup: extremely favorable
Underworld Breach |
On paper this matchup looks easy because they neither run
How To Win:
Keep their graveyard in check with Endurance and
| bring in | take out |
|---|---|
|
|
Overall matchup: clearly favorable
Five-Color Zoo |
A good matchup for us, they have a decent clock but not quite the tools to stop us.
How To Win:
Don't derp around. Keep a fast hand. Force of Vigor and Engineered Explosives help us deal with their most threatening outputs. Always be aware that they can easily deal the last five points of damage with
| bring in | take out |
|---|---|
|
|
Overall matchup: clearly favorable
Monored/Izzet Prowess |
Even though many cards overlap with the Burn deck, Prowess is way more explosive and can kill us as early as turn three with all their free spells like
How To Win:
If we have Engineered Explosives in our starting hand, chances we win are fairly high because their weak spot is relying on typically twelve one-drop creatures. This almost guarantees us a two-, three-, or even four-for-one trade. Try to keep their graveyard in check with Endurance to avoid too much damage from their flying threats and a Lava Dart flashback. Unfortunately, even though Prowess often packs Magus of the Moon, we cannot afford boarding in
| bring in | take out |
|---|---|
|
|
Overall matchup: slightly unfavorable
Amulet Titan (Mirror) |
Mirror matches of decks based on creature combos are always stupid. However, there are more twists to it than initially expected.
How To Win:
Being on the draw is obviously a huge disadvantage in this matchup. It is almost always won by the person who is able to successfully resolve a Primeval Titan and attack with it first. However, being the more experienced and better pilot is even more important.
Attack their mana base aggressively with Boseiju, Who Endures. Don't fall into the trap of ramping your opponent by killing their
We board in every removal we can find. Prevent Primeval Titan from being cast. If you are unable to do that, prevent it from attacking at every cost. Hopefully, this guide gives you the knowledge of this archetype and its lines necessary to come out on top more often than not.
| bring in | take out |
|---|---|
|
|
Five-Color/Temur Rhinos |
There are two prevalent archetypes. We would much rather play against Five-Color Rhinos with
How To Win:
I know I'm repeating myself, but just be faster. Unfortunately, our creatures and
| bring in | take out |
|---|---|
|
|
Force only comes in against Temur. Against the five-color version we keep Colossus and Radiant Fountain.
Overall matchup: unfavorable (Temur) to slightly favorable (Five-Color).
White-Blue Control |
White-Blue Control can almost be considered an Enchantress deck in 2023. Their main deck alone contains ten to eleven enchantments across Leyline Binding,
How To Win:
Never, I repeat, never overcommit. They are tapped out and we have double
In game one, our plan is rather simple: Find a
Game two isn't as simple because
One last important note: There are certain board states where they assemble a soft lock with
Pro Tip:
Copying their
| bring in | take out |
|---|---|
|
|
Overall matchup: slightly favorable
Yawgmoth |
While not necessarily terrible, I hate this matchup. Their combo is just superconsistent, and some lists even have the nightmare duo of
How To Win:
Keep an interactive hand with Endurance or Dismember and at least one Forest. Keeping an explosive hand isn't always the best choice. Don't get me wrong, resolving
Sequencing is very important in this matchup. They can ambush us with
Pro Tip:
| bring in | take out |
|---|---|
|
|
Overall matchup: even.
Living End |
This is another skill-heavy matchup. Our opponent's main deck contains cards that are rarely seen in game one, such as
How To Win:
If we want to be successful, we have to understand this matchup well. So getting a lot of repetitions in is especially important here. We attack their graveyard with everything we have. Bojuka Bog and Endurance are our best cards. If you have access to
Even though good Living End players board in
Pro Tip:
One of our best tricks on the draw is to clean up and discard a Primeval Titan. If we manage to do this twice, we are very unlikely to lose because two 6/6 tramplers with two triggers are a beating for every opponent. There are only two big problems. How do we know what we face on turn one, and when do we gamble, even if our hand sucks otherwise? This is what I mean by knowing the ins and outs of this matchup, recognizing Living End's play patterns and the cards they play. Look for the signs. Do they drop
This trick, by the way, is tried and tested. It worked at LMS Paris where I went to discard twice,
| bring in | take out |
|---|---|
|
|
Overall matchup: even.
Jund/Jund Saga |
Pretty easy. They neither have the tools to race us nor to deal with our Primeval Titan. The only thing we don't want to see is a turn two
How To Win:
If we resolve one Primeval Titan, we almost certainly win as they cannot keep up with our value. Keep their graveyard in check with Endurance and Bojuka Bog. Then, we almost beat half their deck:
If you are afraid of this matchup (which you really shouldn't be) or there are only Jund boomer players in your local meta, bring
| bring in | take out |
|---|---|
|
|
Overall matchup: highly favorable
Eldrazi/Green Tron |
We have a fairly favorable matchup against both iterations. Eldrazi Tron's clock is better while Green Tron can spiral out of control faster if we let them. However, most of the time, we are faster and have board interaction to keep them off turn three Tron with Boseiju, Who Endures. Eldrazi Tron has four
How To Win:
Keep them off Tron at any cost. We are favored, but don't derp around too much. Eldrazi Tron has a reasonable clock when they have one or even multiple
Pro Tip:
If we happen to run
If your main deck doesn't include Engineered Explosives, please don't bother boarding it in. It is not good at all in this matchup!
| bring in | take out |
|---|---|
|
|
Force only comes in against Green Tron. Dismember and the second Tracker only come in against Eldrazi Tron.
Overall matchup: highly favorable
Goblins |
Most of the time, whoever is on the play wins this one. We are both turn three creature combo decks. We mostly cannot interact with each other in game one. The sideboard games get more interactive, but only to a certain degree.
How To Win:
Just be faster and play around
Pro Tip:
When they target a creature of ours with
| bring in | take out |
|---|---|
|
|
Overall matchup: unfavorable
Stoneblade |
This matchup basically plays out like our game against White-Blue Control, with the difference that both sides are inclined to close the game quickly. They ideally want to play their
How To Win:
Try to turn off
Pro Tip:
| bring in | take out |
|---|---|
|
|
Overall matchup: favorable
Hardened Scales |
This deck can spiral out of control very fast with
How To Win:
Keep their board under control at all costs. Try to stop the modular chain by clearing their full board. We should be favored in game two and three because a lot of hate comes in on our side while they have no real way to interact with a resolved
Pro Tip:
Our opponent has to target another creature to move +1/+1 counters via modular. Wait for the target to be announced and destroy that creature with a timely Dismember or Force then to get rid of the counters forever.
| bring in | take out |
|---|---|
|
|
Overall matchup: clearly favorable
Red-Green Titan Shift |
Easy. They are way too slow to keep up with our combo kill. Their Primeval Titan does not come into play before turn four, and even then they often need two additional turns to close out the game.
How To Win:
The only card we have to worry about is
| bring in | take out |
|---|---|
|
|
Overall matchup: highly favorable
Temur Scapeshift |
This matchup is very annoying because they hide their combo behind a control shell.
How To Win:
The more explosive our start, the better our chances to win because they can basically only handle our threats temporarily by bouncing or tapping them down. They have
Pro Tip:
Valakut, the Molten Pinnacle triggers check upon resolution, which means: if we destroy one of their Mountains with the triggers on the stack leaving less than six, the whole ability fizzles. I did this countless times with
| bring in | take out |
|---|---|
|
|
Overall matchup: even.
Asmo Food |
A strategy that is rather unpopular offline, it is actually fairly strong. The variously colored versions play out quite differently. Black-green overwhelms with value and slowly drains us out with
How To Win:
Most importantly, stop them from getting infinite turns by killing their
| bring in | take out |
|---|---|
|
|
Overall matchup: slightly unfavorable
Four-Color Omnath Elementals |
This deck lost a lot of consistency and strength with the banning of
How To Win:
Don't overcommit on creatures. While they have a lot of free spells in
Be aware that some lists run
| bring in | take out |
|---|---|
|
|
Overall matchup: clearly favorable
Death's Shadow |
Even though I see us slightly favored, be prepared for the 13/13
How To Win:
A well-timed
Pro Tip:
Be careful when attacking into one or multiple Death's Shadows. This can backfire if we mess up the trample damage. When we attack with a 6/6 Titan and our opponent blocks with a 1/1 Shadow, the latter can survive. You might wonder how this is possible. If we assign, say, 1 lethal combat damage to
Their prime counter is
| bring in | take out |
|---|---|
|
|
Overall matchup: slightly favorable
Five-Color Humans |
Sure, they can get us with absurd draws and double
How To Win:
Have a reasonable clock yourself and fetch for Engineered Explosives if you notice they overwhelm the board.
Pro Tip:
Every noncreature spell costs us one more while
| bring in | take out |
|---|---|
|
|
Overall matchup: highly favorable
Monoblack Coffers |
This is a fun deck, but it is not prepared for a proper fight against us. They heavily rely on
How To Win:
Always target their
| bring in | take out |
|---|---|
|
|
Overall matchup: highly favorable
Blue/Colorless Affinity |
Both versions try to overwhelm the board, even though each plays out differently. The colorless version tries to dump their whole hand as early as turn two while the monoblue tries to generate more value with
How To Win:
As long as we play around
| bring in | take out |
|---|---|
|
|
Overall matchup: highly favorable
Merfolk |
At first glance, this matchup looks favorable for us, but it is actually fairly even. They have a reasonable clock and interaction for our noncreature spells in
How To Win:
Try to force two-for-one trades. We have no interaction for their answers, so just make it as costly as possible for them. Cast the turn one Amulet of Vigor into their Force of Negation, slam the Primeval Titan into their Subtlety. As long as we trade one for two, everything is fine. We board out our
Pro Tip:
Bouncing the land with Spreading Seas or the counter from Tide Shaper attached to it lets the enchantment or counter fall off and can render islandwalk moot. However, Dryad of the Ilysian Grove gives every land of ours all basic land types, so there are board states where we don't want to play it out when facing
| bring in | take out |
|---|---|
|
|
Overall matchup: even.
Infect |
One of our worst, if not the worst, matchup. Not only is Infect capable of winning as early as turn two, they also have an unblockable
How To Win:
We board in all the removal we can find and take aggressive mulligans to get either a very explosive start of our own or a very interaction-heavy hand. Most of the time, they keep hands with only one or two creatures. If we are able to remove them, they might be stranded with only pump spells, and we can steal a win in this nightmare matchup.
Pro Tip:
Never fight during their combat step unless absolutely necessary. Let them make the first move or fight in their end step so they use their pump and protection spells without distributing additional poison. Them tapping out gives us the green light to cast an Engineered Explosives that can't be countered on our turn.
| bring in | take out |
|---|---|
|
|
Overall matchup: highly unfavorable
Calibrated Blast Combo |
Luckily for us, this is pretty much a meme deck. They run so many nonfunctional cards that they brick very often. Moreover, they play almost as many lands as we do, and their only in-game action is essentially casting
How To Win:
Honestly, this is horrendous. Just hope for them to brick and for us to be faster. We have no counterspell in our 75, which would be our only way to interact with spells cast off their hand. The only thing we can and should do is keep their graveyard in check with Bojuka Bog and Endurance so they cannot flashback their Blast and retrace their
| bring in | take out |
|---|---|
|
|
Overall matchup: extremely unfavorable
Dimir Mill |
This is worse than Infect, our worst matchup aside from Calibrated Blast. The printing of
How To Win:
Honestly, just hope they don't hit a
Make sure that our Endurance resolves by casting it via
This is the rare occasion where I recommend going with the 72-card special postboard, which most likely lets us survive one more turn. There's no rule in Magic [since 2013] that forbids boarding up to more than 60 cards, so we should use it to our advantage.
Pro Tip:
Primeval Titan's search effect is optional. If we suspect them to have an
| bring in |
|---|
|
Overall matchup: highly unfavorable
Red-Green Ponza |
If we know what we are up against, this is a rather comfortable matchup. We just play around
How To Win:
We try to keep a hand with a basic Forest and try to avoid exposing our precious bounce lands to a
| bring in | take out |
|---|---|
|
|
Overall matchup: clearly favorable
Storm |
This is a straight-up race. Storm cannot really interact with what we are doing, and we can only attack their graveyard with Endurance and Bojuka Bog, which admittedly makes storming off way harder for them.
How To Win:
We board in every piece of graveyard hate and targeted removal we can find. Be aware that some lists include Blood Moon in their sideboard. It is possible they try to overwhelm us with a big
If you run
| bring in | take out |
|---|---|
|
|
Overall matchup: even.
Dredge |
Maybe a blast from the past, but I still run into it from time to time, especially at Friday Night Magic. Unless they have the nuts, they do nothing to cause us a headache.
How To Win:
We power out Primeval Titan and grab our Bojuka Bog as fast as possible. Our main deck Endurance comes in very handy and should let us enjoy a rather comfortable game one. In game two, we get access to two more Endurances. Just be aware that their start can be ultraexplosive. So we should rather take aggressive mulligans until we find a super fast hand on our own, or a piece of interaction to keep their graveyard in check.
| bring in | take out |
|---|---|
|
|
Overall matchup: highly favorable
Monowhite/Red-White Hatebears |
Monowhite Hatebears is barely even a deck anymore in Modern. Alhough basically each set brings more hatebears, having the right in hand at the right time is getting more and more difficult since the format's metagame has become so diverse. If they happen to have the correct selection in hand, with
How To Win:
If we survive the early game and are able to resolve a Primeval Titan, we are almost guaranteed to win.
| bring in | take out |
|---|---|
|
|
Overall matchup: highly favorable
Eight Rack |
I haven't seen this deck in a while. But for the sake of completeness, you get a sideboard guide for this matchup as well.
How To Win:
Honestly, playing our regular game should suffice. Much of their discard becomes dead quickly when we're left with mainly lands in hand, improving our topdecks even further. This also eansures
Pro Tip:
If we urgently need just any cards in hand, we can simply get two bounce lands off Primeval Titan and return both.
| bring in | take out |
|---|---|
|
|
Overall matchup: highly favorable
Bogles |
Another blast from the past. This is essentially as much of a freebie as playing against Burn. We cannot interact with their creatures, but the good thing is, we normally don't have to.
| bring in | take out |
|---|---|
|
|
Overall matchup: extremely favorable
Enchantress |
Easy matchup. They are quite slow and try to resolve a
How To Win:
Keep their draw engine in check and, most importantly, play around Blood Moon. Other than that, we have plenty of time to kill them in basically any way desired.
| bring in | take out |
|---|---|
|
|
Overall matchup: extremely favorable
Elves |
This deck would likely be considered tier one if a card called
How To Win:
We bring in all the removal we can find. They will likely keep a greedy hand against us, with mana dorks and a low land count, in part because that's what their deck does. So if we are able to kill their creatures early on, they may not recover. Nonetheless, a good player will only commit to the board if they can overcome potential pieces of interaction.
| bring in | take out |
|---|---|
|
|
Overall matchup: highly unfavorable
Red-Green Belcher |
As is the case so often, the pairing against another combo deck comes down to a simple race. If they play it correctly and never give us a chance to destroy their
How To Win:
Aggressively target their lands with Boseiju, Who Endures. It is a guaranteed
| bring in | take out |
|---|---|
|
|
Overall matchup: clearly unfavorable
Opinions expressed in this article are those of the author, not of Cardmarket.